Hey Ninjas!
Have you heard? We’ve got a brand-spanking new dashboard! Woohoo! It was a big task and took a while to finish, but it’s all worth it!
Here’s the before and after look:


Pretty amazing huh? Wait until you know what it does.
The new dashboard update includes:
Custom date range analytics
You can now see your leads, shoots, and payments according to any date periods. You can choose the presets 7 Days, 30 Days, Mtd (Month to date), Ytd (Year to date) or set the date period by clicking on the calendar drop down.

Analytics by job type
You can now filter the data by different job types. To do that, just click on the drop down menu on the upper left hand side to see the list.

Drag and drop
You can drag and drop the panels around, so they are not stuck with the default arrangement. Hover your mouse on the top part of each section to drag. (Make sure the pointer turns to the hand symbol before you start dragging.)

Note: The top graph panel can only be dragged to the bottom of the other 4 panels or on top.
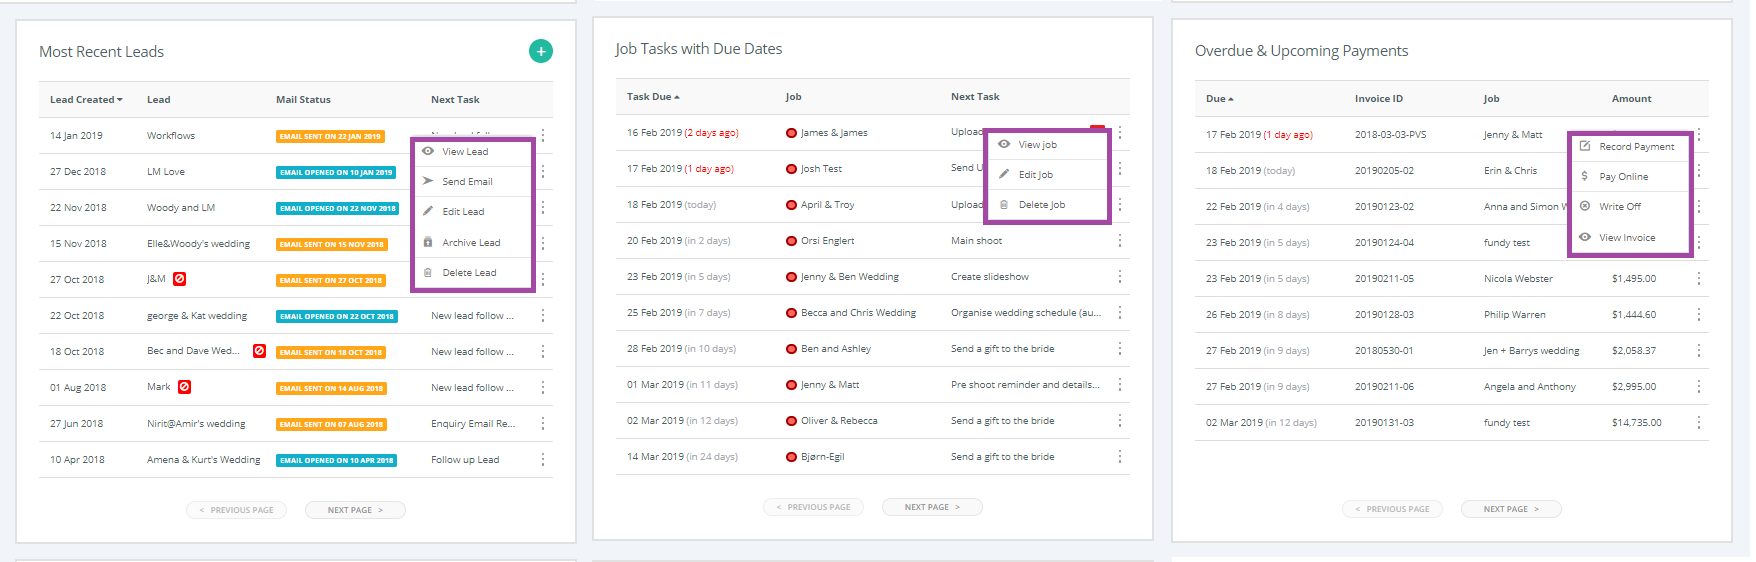
New Leads panel
There’s now a most Recent Leads panel on the Dashboard. So you’ll know at a glance if there’s a new enquiry. You can also sort it to show the newest or oldest lead, vice versa and also view other leads using the ‘Next/Previous page’ button.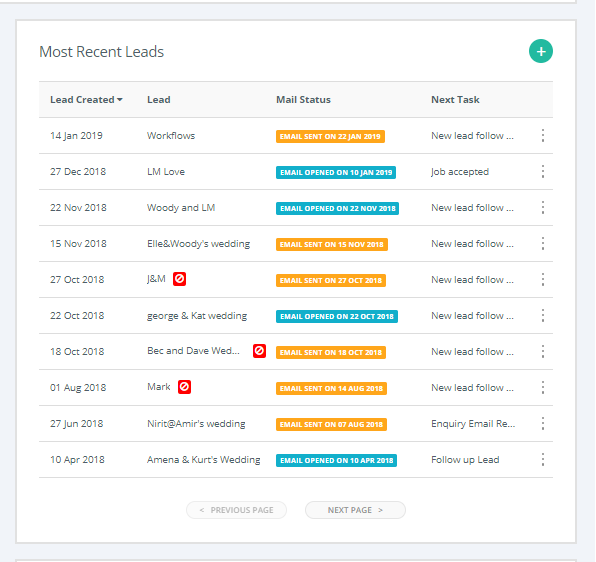
Updated Jobs panel
These are now job tasks with due dates so you know which tasks to action first. Same as above, you can sort the Task Due and view other jobs using the ‘Next/Previous page’ button. 
New quick links
3 dot options on a Lead, Job or Payment. Whether you simply want to view the lead/job or invoice, send an email, archive a lead, record or write off a payment. You can do them all straight from the Dashboard.
FUNDY INTEGRATION
We’re excited to finally have integrated with Fundy Designer. If you’re using Fundy and want to track sales data in Studio Ninja you can easily export your invoice XML files from Fundy and import them directly into your Studio Ninja corresponding jobs. Easy!
Click here to know more about the Integration.
NEW WORKFLOW > SEND EMAIL LIGHTBOX
Have you accidentally ticked an automation task and sent the wrong email? I did and had to explain to my client. Whew!
Now here’s the good news, whenever you tick a task in your workflow that sends an email, instead of it going out blind, a lightbox will now appear allowing you to double check the email content or make changes before sending. No more awkward emails!